Nginx Can't Read .crt Ssl Certificate Permission
A previous version of this tutorial was written by Justin Ellingwood
Introduction
TLS, or transport layer security, and its predecessor SSL, which stands for secure sockets layer, are spider web protocols used to wrap normal traffic in a protected, encrypted wrapper.
Using this technology, servers can send traffic safely betwixt the server and clients without the possibility of the messages being intercepted by outside parties. The certificate system also assists users in verifying the identity of the sites that they are connecting with.
In this guide, we volition bear witness you how to prepare a self-signed SSL certificate for utilize with an Nginx web server on an Ubuntu xviii.04 server.
Annotation: A self-signed certificate will encrypt communication between your server and whatsoever clients. Notwithstanding, considering information technology is not signed by any of the trusted certificate regime included with web browsers, users cannot use the certificate to validate the identity of your server automatically.
A cocky-signed certificate may exist appropriate if you do non have a domain name associated with your server and for instances where the encrypted spider web interface is non user-facing. If yous exercise have a domain name, in many cases it is better to utilize a CA-signed certificate. Y'all tin discover out how to set up a free trusted certificate with the Let's Encrypt project hither.
Prerequisites
Before you begin, you should take a non-root user configured with sudo privileges. You can acquire how to set up such a user account by post-obit our initial server setup for Ubuntu 18.04.
You will also need to take the Nginx spider web server installed. If you would similar to install an unabridged LEMP (Linux, Nginx, MySQL, PHP) stack on your server, y'all tin can follow our guide on setting up LEMP on Ubuntu 18.04.
If you merely desire the Nginx spider web server, you can instead follow our guide on installing Nginx on Ubuntu xviii.04.
When you have completed the prerequisites, keep beneath.
Step ane – Creating the SSL Certificate
TLS/SSL works by using a combination of a public certificate and a private key. The SSL key is kept secret on the server. It is used to encrypt content sent to clients. The SSL document is publicly shared with anyone requesting the content. It can be used to decrypt the content signed by the associated SSL key.
We can create a self-signed key and certificate pair with OpenSSL in a single control:
- sudo openssl req -x509 -nodes -days 365 -newkey rsa:2048 -keyout /etc/ssl/private/nginx-selfsigned.key -out /etc/ssl/certs/nginx-selfsigned.crt
You will be asked a series of questions. Before we become over that, let's take a wait at what is happening in the control we are issuing:
- openssl: This is the bones command line tool for creating and managing OpenSSL certificates, keys, and other files.
- req: This subcommand specifies that we want to use X.509 certificate signing request (CSR) management. The "X.509" is a public key infrastructure standard that SSL and TLS adheres to for its key and document direction. Nosotros want to create a new X.509 cert, and then nosotros are using this subcommand.
- -x509: This further modifies the previous subcommand by telling the utility that nosotros want to make a self-signed document instead of generating a certificate signing asking, as would normally happen.
- -nodes: This tells OpenSSL to skip the option to secure our document with a passphrase. We need Nginx to be able to read the file, without user intervention, when the server starts up. A passphrase would forbid this from happening considering nosotros would have to enter information technology subsequently every restart.
- -days 365: This option sets the length of time that the certificate volition be considered valid. We prepare it for ane yr here.
- -newkey rsa:2048: This specifies that we desire to generate a new document and a new key at the same fourth dimension. We did not create the key that is required to sign the certificate in a previous step, then we demand to create it forth with the document. The
rsa:2048portion tells it to brand an RSA key that is 2048 $.25 long. - -keyout: This line tells OpenSSL where to place the generated private key file that nosotros are creating.
- -out: This tells OpenSSL where to place the document that we are creating.
As nosotros stated higher up, these options will create both a key file and a certificate. We will exist asked a few questions about our server in club to embed the information correctly in the certificate.
Fill up out the prompts accordingly. The about important line is the 1 that requests the Common Name (eastward.g. server FQDN or YOUR name). You need to enter the domain name associated with your server or, more likely, your server'southward public IP address.
The entirety of the prompts will wait something similar this:
Output
Country Proper name (2 letter of the alphabet lawmaking) [AU]:U.s. State or Province Name (full name) [Some-Country]:New York Locality Proper noun (eg, city) []:New York Urban center Organization Proper name (eg, company) [Net Widgits Pty Ltd]:Bouncy Castles, Inc. Organizational Unit Proper name (eg, section) []:Ministry of Water Slides Common Proper noun (e.g. server FQDN or YOUR name) []:server_IP_address Email Address []:admin@your_domain.com Both of the files you created will be placed in the appropriate subdirectories of the /etc/ssl directory.
While we are using OpenSSL, we should also create a strong Diffie-Hellman grouping, which is used in negotiating Perfect Forward Secrecy with clients.
We can practice this past typing:
- sudo openssl dhparam -out /etc/nginx/dhparam.pem 4096
This will take a while, but when it's done you will have a potent DH grouping at /etc/nginx/dhparam.pem that nosotros tin can use in our configuration.
Footstep 2 – Configuring Nginx to Use SSL
We accept created our key and certificate files under the /etc/ssl directory. Now nosotros only need to modify our Nginx configuration to accept advantage of these.
We will make a few adjustments to our configuration.
- Nosotros will create a configuration snippet containing our SSL key and certificate file locations.
- We will create a configuration snippet containing strong SSL settings that tin be used with any certificates in the futurity.
- We will conform our Nginx server blocks to handle SSL requests and use the two snippets above.
This method of configuring Nginx will allow us to keep clean server blocks and put common configuration segments into reusable modules.
Creating a Configuration Snippet Pointing to the SSL Key and Certificate
Commencement, let's create a new Nginx configuration snippet in the /etc/nginx/snippets directory.
To properly distinguish the purpose of this file, permit'due south telephone call it self-signed.conf:
- sudo nano /etc/nginx/snippets/self-signed.conf
Within this file, we demand to set up the ssl_certificate directive to our certificate file and the ssl_certificate_key to the associated key. In our case, this will look like this:
/etc/nginx/snippets/cocky-signed.conf
ssl_certificate /etc/ssl/certs/nginx-selfsigned.crt; ssl_certificate_key /etc/ssl/private/nginx-selfsigned.fundamental; When you've added those lines, save and close the file.
Creating a Configuration Snippet with Strong Encryption Settings
Next, we volition create another snippet that will define some SSL settings. This will fix Nginx up with a strong SSL cipher suite and enable some advanced features that will help go along our server secure.
The parameters we volition fix tin can be reused in future Nginx configurations, so nosotros volition give the file a generic proper noun:
- sudo nano /etc/nginx/snippets/ssl-params.conf
To fix Nginx SSL securely, we will be using the recommendations by Remy van Elst on the Cipherli.st site. This site is designed to provide easy-to-consume encryption settings for popular software.
The suggested settings on the site linked to above offer strong security. Sometimes, this comes at the cost of greater client compatibility. If you lot need to back up older clients, at that place is an alternative listing that tin exist accessed by clicking the link on the page labelled "Yes, give me a ciphersuite that works with legacy / sometime software." That list can be substituted for the items copied below.
The choice of which config you utilize will depend largely on what yous need to support. They both will provide great security.
For our purposes, we tin can copy the provided settings in their entirety. We just need to make a few small modifications.
First, nosotros will add together our preferred DNS resolver for upstream requests. We will apply Google's for this guide.
Second, nosotros volition comment out the line that sets the strict transport security header. Before uncommenting this line, you should take take a moment to read up on HTTP Strict Ship Security, or HSTS, and specifically about the "preload" functionality. Preloading HSTS provides increased security, only can have far reaching consequences if accidentally enabled or enabled incorrectly.
Re-create the following into your ssl-params.conf snippet file:
/etc/nginx/snippets/ssl-params.conf
ssl_protocols TLSv1.2; ssl_prefer_server_ciphers on; ssl_dhparam /etc/nginx/dhparam.pem; ssl_ciphers ECDHE-RSA-AES256-GCM-SHA512:DHE-RSA-AES256-GCM-SHA512:ECDHE-RSA-AES256-GCM-SHA384:DHE-RSA-AES256-GCM-SHA384:ECDHE-RSA-AES256-SHA384; ssl_ecdh_curve secp384r1; # Requires nginx >= ane.1.0 ssl_session_timeout 10m; ssl_session_cache shared:SSL:10m; ssl_session_tickets off; # Requires nginx >= 1.5.ix ssl_stapling on; # Requires nginx >= ane.3.7 ssl_stapling_verify on; # Requires nginx => 1.3.7 resolver 8.8.8.8 8.8.4.four valid=300s; resolver_timeout 5s; # Disable strict transport security for at present. You tin can uncomment the post-obit # line if you understand the implications. # add_header Strict-Transport-Security "max-historic period=63072000; includeSubDomains; preload"; add_header X-Frame-Options DENY; add_header X-Content-Type-Options nosniff; add_header X-XSS-Protection "1; manner=block"; Because we are using a self-signed certificate, the SSL stapling volition non be used. Nginx will output a warning, disable stapling for our cocky-signed cert, and keep to operate correctly.
Save and close the file when you are finished.
Adjusting the Nginx Configuration to Use SSL
Now that nosotros take our snippets, we can adapt our Nginx configuration to enable SSL.
We will assume in this guide that you are using a custom server block configuration file in the /etc/nginx/sites-available directory. We will employ /etc/nginx/sites-available/example.com for this example. Substitute your configuration filename as needed.
Earlier we go whatever farther, let'due south back up our current configuration file:
- sudo cp /etc/nginx/sites-available/instance.com /etc/nginx/sites-available/example.com.bak
Now, open the configuration file to brand adjustments:
- sudo nano /etc/nginx/sites-available/example.com
Inside, your server block probably begins similar to this:
/etc/nginx/sites-bachelor/example.com
server { mind lxxx; listen [::]:fourscore; server_name example.com www.instance.com; root /var/www/case.com/html; alphabetize index.html index.htm index.nginx-debian.html; . . . } Your file may be in a different society, and instead of the root and index directives y'all may have some location, proxy_pass, or other custom configuration statements. This is ok, as we only need to update the listen directives and include our SSL snippets. We will be modifying this existing server block to serve SSL traffic on port 443, then create a new server cake to respond on port 80 and automatically redirect traffic to port 443.
Note: We will apply a 302 redirect until we have verified that everything is working properly. Later on, we can change this to a permanent 301 redirect.
In your existing configuration file, update the two listen statements to employ port 443 and ssl, then include the two snippet files we created in previous steps:
/etc/nginx/sites-available/case.com
server { listen 443 ssl; listen [::]:443 ssl; include snippets/self-signed.conf; include snippets/ssl-params.conf; server_name example.com www.example.com; root /var/www/instance.com/html; index index.html index.htm index.nginx-debian.html; . . . } Next, paste a second server block into the configuration file, after the closing bracket (}) of the first cake:
/etc/nginx/sites-available/example.com
. . . server { heed 80; listen [::]:80; server_name instance.com www.example.com; return 302 https://$server_name$request_uri; } ``` This is a bare-bones configuration that listens on port 80 and performs the redirect to HTTPS. Salve and close the file when you are finished editing it. ## Step 3 – Adjusting the Firewall If you have the `ufw` firewall enabled, as recommended by the prerequisite guides, yous'll need to adjust the settings to allow for SSL traffic. Luckily, Nginx registers a few profiles with `ufw` upon installation. We tin can see the available profiles by typing: ```command sudo ufw app list You should see a listing similar this:
Output
Available applications: Nginx Full Nginx HTTP Nginx HTTPS OpenSSH You tin meet the current setting by typing:
- sudo ufw condition
Information technology will probably look like this, meaning that only HTTP traffic is immune to the spider web server:
Output
Condition: active To Action From -- ------ ---- OpenSSH ALLOW Anywhere Nginx HTTP Allow Anywhere OpenSSH (v6) ALLOW Anywhere (v6) Nginx HTTP (v6) Allow Anywhere (v6) To additionally let in HTTPS traffic, we can allow the "Nginx Full" contour and so delete the redundant "Nginx HTTP" contour assart:
- sudo ufw permit 'Nginx Total'
- sudo ufw delete let 'Nginx HTTP'
Your condition should look like this at present:
- sudo ufw status
Output
Status: active To Action From -- ------ ---- OpenSSH Permit Anywhere Nginx Full ALLOW Anywhere OpenSSH (v6) ALLOW Anywhere (v6) Nginx Full (v6) Allow Anywhere (v6) Stride 4 – Enabling the Changes in Nginx
Now that we've fabricated our changes and adapted our firewall, nosotros can restart Nginx to implement our new changes.
First, nosotros should cheque to brand certain that there are no syntax errors in our files. We can practice this by typing:
- sudo nginx -t
If everything is successful, you will go a result that looks similar this:
Output
nginx: [warn] "ssl_stapling" ignored, issuer certificate not institute nginx: the configuration file /etc/nginx/nginx.conf syntax is ok nginx: configuration file /etc/nginx/nginx.conf test is successful Observe the warning in the beginning. Equally noted earlier, this detail setting throws a warning since our self-signed document can't use SSL stapling. This is expected and our server tin can still encrypt connections correctly.
If your output matches the to a higher place, your configuration file has no syntax errors. Nosotros can safely restart Nginx to implement our changes:
- sudo systemctl restart nginx
Step 5 – Testing Encryption
Now, we're fix to test our SSL server.
Open up your web browser and type https:// followed by your server's domain name or IP into the accost bar:
https://server_domain_or_IP Because the certificate we created isn't signed past one of your browser's trusted certificate government, you volition likely see a scary looking warning like the 1 below:
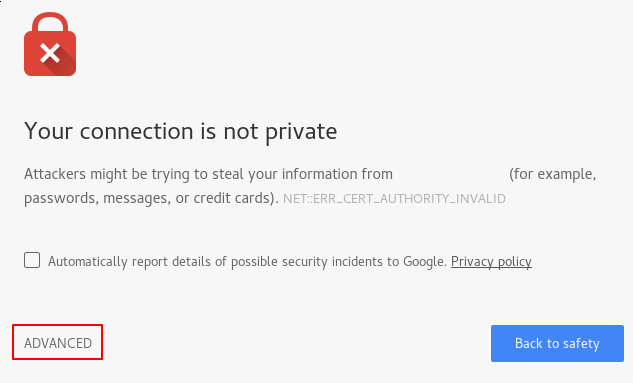
This is expected and normal. We are just interested in the encryption aspect of our certificate, not the tertiary political party validation of our host'southward authenticity. Click "ADVANCED" and so the link provided to proceed to your host anyways:
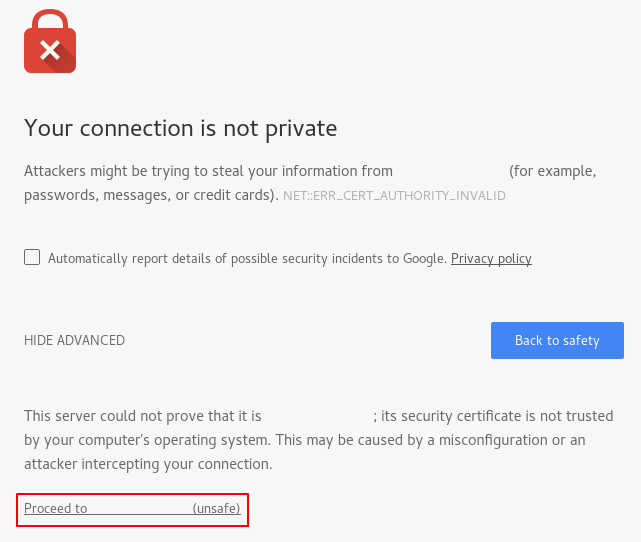
You should be taken to your site. If you look in the browser address bar, you will run into a lock with an "ten" over it. In this case, this but means that the certificate cannot exist validated. It is still encrypting your connectedness.
If y'all configured Nginx with ii server blocks, automatically redirecting HTTP content to HTTPS, y'all can also cheque whether the redirect functions correctly:
http://server_domain_or_IP If this results in the same icon, this ways that your redirect worked correctly.
Footstep 6 – Irresolute to a Permanent Redirect
If your redirect worked correctly and you are certain you want to permit only encrypted traffic, yous should modify the Nginx configuration to make the redirect permanent.
Open up your server cake configuration file again:
- sudo nano /etc/nginx/sites-available/example.com
Find the return 302 and change it to return 301:
/etc/nginx/sites-bachelor/example.com
return 301 https://$server_name$request_uri; Relieve and close the file.
Check your configuration for syntax errors:
- sudo nginx -t
When y'all're ready, restart Nginx to make the redirect permanent:
- sudo systemctl restart nginx
Determination
You lot have configured your Nginx server to use potent encryption for client connections. This will allow yous serve requests securely, and will prevent outside parties from reading your traffic.
Nginx Can't Read .crt Ssl Certificate Permission
Source: https://www.digitalocean.com/community/tutorials/how-to-create-a-self-signed-ssl-certificate-for-nginx-in-ubuntu-18-04